Customized Photo Magic Mug (325 ml) – Complete Guide with Sublimation Printing
Introduction
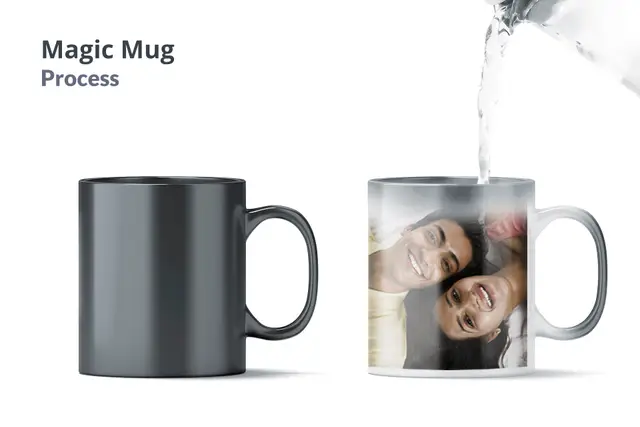
Coffee mugs are not just for drinking tea or coffee anymore—they have become one of the most popular personalized gifts. Among them, the Photo Magic Mug is a customer favorite. This unique mug stays black when cold, but when hot liquid is poured inside, the hidden photo or design magically appears.
In this blog, we’ll explain:
-
What is a Magic Mug?
-
Benefits of using Magic Mugs as gifts or branding items
-
Step-by-step process of printing on a Photo Magic Mug using a sublimation machine
☕ What is a Photo Magic Mug?
A Magic Mug is a heat-sensitive ceramic mug coated with a special layer of thermochromic ink. At room temperature, the mug looks black. When you pour in a hot drink, the coating turns transparent, revealing the printed photo or logo underneath.
🎁 Why Choose Customized Magic Mugs?
✔ Perfect surprise gift for birthdays, anniversaries, and festivals
✔ Unique way to promote a brand with a hidden logo
✔ Affordable, durable, and attractive
✔ Fun element – your photo/design appears only with hot liquid
🖨 How to Print on a Photo Magic Mug Using Sublimation Machine
Here’s a simple step-by-step guide:
🔹 Materials Required
-
Sublimation Printer (with sublimation ink)
-
Sublimation Paper
-
Heat Press Machine (Mug Press)
-
325 ml Magic Mug (sublimation coated)
-
Heat-resistant Tape
-
Scissors
🔹 Step 1: Design Preparation
-
Use CorelDRAW, Photoshop, or Canva to create your mug design.
-
The design size should match the printable area of the mug (usually 20 cm x 9 cm approx).
-
Print the design using a sublimation printer on sublimation paper.
🔹 Step 2: Wrapping the Mug
-
Place the printed sublimation paper on the Magic Mug.
-
Use heat-resistant tape to fix the paper tightly around the mug.
-
Make sure the design is properly aligned.
🔹 Step 3: Heat Press Setup
-
Preheat your Mug Heat Press Machine to around 180°C (356°F).
-
Place the wrapped mug into the press.
-
Set the timer for 180–200 seconds (depending on machine quality).
🔹 Step 4: Printing Process
-
Once the time is up, carefully remove the mug using heat-resistant gloves.
-
Peel off the sublimation paper gently.
-
Your customized photo magic mug design will now be visible (only when hot).
🔹 Step 5: Cooling
-
Allow the mug to cool at room temperature.
-
Test it by pouring hot water/coffee inside – the hidden photo will appear like magic!
⚡ Tips for Best Results
-
Always use high-quality sublimation ink & paper.
-
Avoid dishwashers; hand wash for longer print life.
-
Don’t overheat – it may damage the thermo-sensitive coating.
🎉 Conclusion
A Customized Photo Magic Mug (325 ml) is more than just a coffee cup—it’s a gift full of surprise and emotions. With a sublimation machine, you can easily print photos, names, logos, or messages and turn a simple mug into a magical keepsake.
Whether you are starting a printing business or looking for unique gifts, magic mugs are an amazing choice to impress your customers and loved ones.
👉 Want to buy customized magic mugs in bulk or need printing services? Contact AIMarketing24 today for the best price in India.